
Here's a family feud that car fanatics have wrassled over for nearly 40 years:
Two cars from one car company, both archetypal muscle cars of the late 60's and early 70's, both designed and marketed to lure torque-starved gearheads away from hot-selling Mustangs and Camaros. These two cars are so embedded in automotive lore that arguments over the superiority of each is the subject of bar stool ballyhoo and online forum fights to this day. In a time when design sensibilities change so rapidly that it's an insult to say, "that's so 2004," the fact that this argument has survived across a generation is a testament to the timeless appeal of these classic cars.
Charger vs. Challenger. Read on...

This illustration is an expanded version of a simpler one I made for my graphic design partner Justin Kite for the promotion of the upcoming Gear Grinder car show in Kansas City, MO on April 17th and 18th. The poster version loses the background buildings to give Justin more elbow room for his design. Limited edition prints of both the promotional poster and the full illustration will be on sale at the show.
For dynamic scenes like these, my usual process would normally have started with a series of thumbnail sketches showing varying points of view, car orientations, and lighting schemes. After selecting the one that the client and I liked, I'd work up a pencil rough of the entire scene before inking, scanning, and embellishing with digital enhancements. Using this process, a scene like this would take, on average, six to eight hours to finish. That's not out of the ordinary for illustration work, but I've been working recently on updating my workflow to reduce the number of early thumbnail sketches I need to get the design layout established. It's hard to call any process that includes a scanner and Photoshop "old school," but that's pretty much what it's becoming.
I now use Google SketchUp to build rough, block models of the major components - in this case, the three cars and the buildings - and push them around the scene until I get the pose I like. The models aren't at all detailed; I'm just careful to locate the wheels at the proper wheelbase and track width, and I try to model the basic body proportions so that they match the car model and year I'll be drawing. To add a sense of motion, I can steer the wheels and roll the bodies against the direction of the turn. I can even change the shadows by varying the sun angle and time of day, all before graphite ever hits paper.
Once the scene is defined in SketchUp, I can print out a low-res .jpeg that I export from the model and use it as an underlay for the detailed sketch. For this scene, I used the same model for all three cars - the Charger, the Challenger, and the cop car in the background. Dozens of photo references of the real cars helped me make the final drawings look accurate. The SketchUp model even provided rough locations for the buildings so I could quickly overlay details like bricks, windows, exhaust hoods, and flying trash cans.
For now, I'm not saving much time in the overall process because of the front-loaded time suck involved in building the models. But once I have generic block models of a few trucks, hot rods, and muscle cars, I'll have a handy kit of parts for any new project.
Now back to the drawing board.
Wednesday, February 18, 2009
It's a Back Alley Brawl, Y'all

Friday, January 23, 2009
Roughing it up a bit.
I'm working on tee shirt design for a long-standing client whose concept requires a '69 Impala hopper poised with one wheel lifted high off the ground.
My usual black-and-white style is pretty clean-edged, like in my '53 Merc and '34 Ford illustrations from a year ago. But now I figure it's time to try something new.
Read on... My usual method begins with inking hard lines over a rough sketch either with pen-and-ink or with my Wacom tablet, then discarding the under-sketch altogether. But to get a rougher feel for the Impala, I used only pencil, much like I did with my '59 Caddy, but with far less regard for cleanliness. I scanned the smeared-up sketch into Photoshop, then applied a Level adjustment to polarize the midtones to either pure black or pure white. This left some white streaks and splotches within the larger black fields, but those were easily refilled with the Pencil Tool.
Next, I applied a hi-res burlap texture on the layer above the image, using a Linear Burn blending mode. I made a mask on that layer that left texture only on the car, not on the background. Then, using the a white Pencil Tool, I added a few highlights.
I'm liking this new style. It has a half-tone feel without the pop art look that goes with it.
No pixels were harmed by Photoshop filters. I swear.
Sunday, November 23, 2008
Fast Times at El Camino High
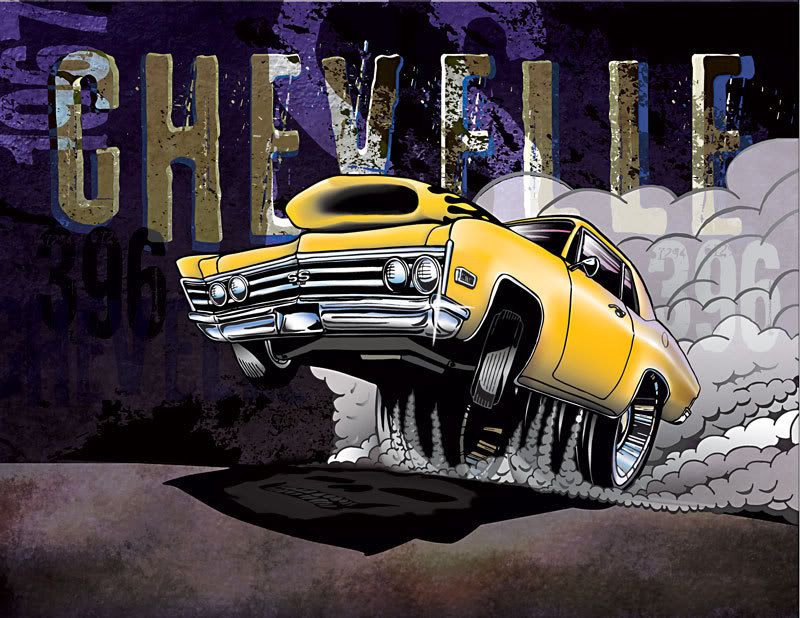
Scott contacted me because he found this illustration of a 1967 Chevelle SS 396 on my portfolio website.

As luck would have it, El Camino High's car is based off a 1970 Chevelle SS. Scott liked the style of the illustration and asked if I could make a few changes to customize it for the school and the show. Read on...
Though Chevelle enthusiasts may disagree with me, the body styles don't differ much between the '67 and '70 model years, especially when rendered in semi-cartoon style. I did have to change the grille from the older four-headlamp setup to the twin headlamp grille that came later. Also, I changed the orientation of the shaker hood to match the one on El Camino's car. Then we added the school's name in the background and squeezed the giant head of a cougar - the school's mascot - into the driver's side window, sort of Big Daddy Roth style. We also threw in a few other goodies designed to poke fun at their rival school.
Here's what we came up with:

The torn edges came from a page of a very old book that good old Bittbox scanned in and offered up for free on his web site. I converted the scan to greyscale, maxed out the contrast, and used the image as a layer mask. Bada bing, bada boom.
With any luck, some of the kids will be wearing this emblem on their shirts while the crews are filming. What a hoot.
Now back to the drawing board.
Monday, November 17, 2008
A 1957 Chevy Bel Air and a Better Mouse Trap
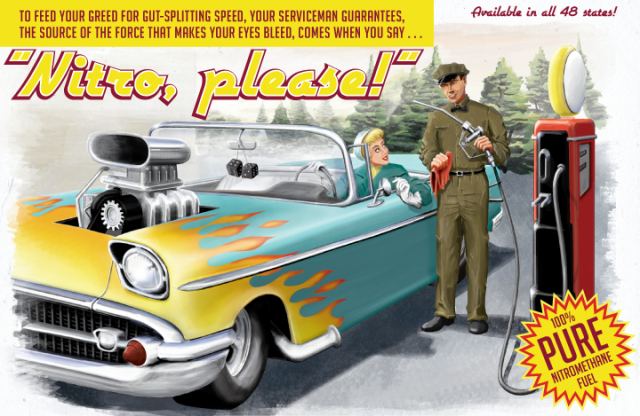
I thought I'd have some fun with a 1950's Texaco ad I found on-line while perusing vintage ads for a themed restaurant in North Kansas City.
The poster is 22" x 14" and was painted digitally in Photoshop using brushes I downloaded free from Bittbox.
The entire painting was done using a mouse, which is a process akin to threading a needle with Novocain shots in each finger and wearing boxing gloves. While blindfolded. And drunk.
Things are looking up for the badger, though. I've done my part to help the global economy by making a very wise purchase.
Read on...
I just purchased a Wacom Intuos3 6x8 pen tablet for just a smidgen under $300.00. I plan on writing more about it once the two of us have had more quality time together.
But in the meantime, here are a couple of things I've noticed:
1) Wacom's customer service is stellar. The tablet had a few performance glitches pretty early on, well before I'd finished pinching all the bubble wrap. I was ready to just pack the thing up and send it back - y'know, with the bubble wrap still intact and all, it seemed the easiest solution. Besides, ever since my Microtek scanning software refused to recognize its own scanner and I had a stunningly abysmal experience with Microtek's laughable technical service, I acquired a profanity-laced Tourettes-like tic at the mere thought of contacting any computer peripheral company with questions of any kind. But Wacom suprised me. I emailed their customer support with a description of the problem, and within a day, a friendly gentleman replied with detailed troubleshooting instructions. And when that fix turned out to be only partially effective, a simple email back to customer service brought another helpful reply within 24 hours. I'm still working through the problems (the pressure sensitivity in brush-mode cuts in and out), but I'm pleased that so far, Wacom has made good on their promise to provide prompt technical support.
2) There's a little button in the Wacom control panel called "Lock Proportions." It's located in the Mapping Tab of the tablet setup. Click it on if you want to remain sane. I'm just sayin'. If it's off (which unfortunately is the default setting) the tablet maps its entire surface to your monitor screen. That sounds fine in theory, but if the tablet and screen are not the same proportion, then you'll see an ellipse whenever you try to draw a circle. Talk about a brain-boink. Sure you may lose a bit of usable tablet space, but unless you feel like retraining your visual cortex, I suggest you turn it on.
3) The tablet's drawing surface and the heal of my hand have a relationship to each other similar to Naugahyde against a sweaty butt-cheek. As a result, I tend to get jumpy lines as I drag my hand across the tablet and it sticks. I'm going to try cutting the fingertips off of a cotton glove and wearing it on my drawing hand, Michael Jackson style, so my hand can slide easily across the tablet. I'll let you know if that works.
4) I reprogrammed the front rocker switch on the pen to act as {alt}-{ctrl}-z, which in Photoshop means "Step Backwards" through the undo history. This is slick because my first attempt at drawing a line is seldom my best one. Somewhere around attempt number eight or nine, I either get the line I want or I simply lower my standards a sufficient level to call it good. With this switch setup, marching through each attempt is as easy as draw, click, draw, click...all with one hand.
I'm working on an "ink" drawing with the pen tablet now. Should be done in a week or so, and I'll post the results here. So far, the tablet experience is so superior, it makes using a mouse feel like trying to draw with a crayon taped to your elbow.
Now back to the drawing board.
Tuesday, September 30, 2008
Don't Fight the Graphite

But I ask you, who doesn't love the feel of a bright yellow Ticonderoga #2 wood pencil twirling in your fingers or tapping on the edge of your desk? Nobody, that's who.
Read on...
I say the wood pencil deserves to return to its iconic stature, with the makin'-it-happen end sharpened to a long, acicular point, and the pretend-it-didn't-happen end gnawed into an unrecognizable wad of crushed metal and moist rubber. Stick it behind your ear. Chew the paint off it. Hold it flat in your hand, thrust your arm upward, slap your wrist with the other hand, and watch your beloved writing implement rocket skyward until the point embeds itself in your office ceiling. Despite written claims to the contrary, Heaven is a place stocked with an endless supply of sharp wood pencils and thousands of square miles of acoustic ceiling tile.
The pencil is a nearly perfect writing instrument. It's also a darn good drawing tool, as any bored art-kid stuck in High School history class will tell you. It can track a thin line that's so faint, you'll swear one of your arm-hairs fell onto the page. With a firm overhand grip, that same pencil can lay down a heavy pool of slick, black powder that, despite your best efforts, will end up partially smudged on your cheek. And with a skilled hand, it will create smooth, luxurious washes of silvery grey in any shade imaginable.
I've always been comfortable drawing with pencils. I've loved them all my life. Hell, I'm 46 years old and I still have a visible piece of pencil lead imbedded under the skin of my right palm from a John Bonham style drumming mishap in the third grade.
Today I use a Ticonderoga No.2 wood pencil for nearly all my pencil-roughs, layouts, contour drawings, and sketches.


They can be sharpened in any standard pencil sharpener, though I've been told that the preferred method is using a sheet of fine-abrasive sandpaper. They're available in several hardnesses, though typically a 6B will do most everything that I need for shaded sketching.
In pencil parlance, the hardness of the lead is graded by varying levels of "H" for "hard" and "B" for "black" (*). HB stands for "Hard Black" (**) and is equivalent to the classic No. 2 pencil. Softer - and therefore darker rendering - pencils are labeled with increasing values of "B." A 6B lead is much softer than an HB, and 9B is softer still. I find that 6B is amazingly versatile for shaded renderings, able to hold a decent point while still laying down a pretty funky bass-note when asked. I suppose having a super soft 9B on hand would be helpful for deep black areas, but I haven't yet found much need for one yet. Harder pencils can range up to 6H, even harder. A 6H pencil makes a very thin, very light line, and is more comfortable in the hands of a draftsman than a sketch artist. It also doubles as an Exact-o knife.
Now, you'll notice that the art pencils don't have erasers attached to them. That's because artist's are nervous critters by nature, and we'd chew them off before we finished our first layout. So, we buy separate erasers, either of the soft block or kneaded variety. Be warned: these are not interchangeable! The block style, usually made from firm chunks of vinyl, erases using an abrasive action. It literally grinds out the graphite particles from the tooth of your paper. It's useful for removing large areas of goof-ups on bond papers, sketch pads, and Bristol board because these papers absorb (sort of) the graphite dust and need a rather aggressive approach to clean-up. Kind of like my 14-year-old stepson.
Kneaded erasers are more like Silly Putty; they are sticky, and they work by lifting graphite right off the paper. You don't usually rub a kneaded eraser across your work, you dab it right onto the area you want removed. Because they're kind of gooey, you can even mold kneaded erasers into pointed shapes to pick off tiny spots without disturbing the surrounding work.


I also use a mechanical pencil. Specifically, I use a Koh-I-Noor 0.7mm drafting pencil loaded with F lead. F is approximately halfway along the pencil hardness scale between HB and H, and I suppose it would be similar to the No. 3 lead in a classic wood pencil, though I can't prove this. I don't know what the F stands for, but let's call it "Fine." The F hardness in a 0.7 mm pencil is very useful for fine detail work, thin contour lines, or anytime I need to draw a hard edge along a metal, cork-back ruler.

Mechanical pencils like the Koh-I-Noor are also available in an absurdly thin 0.3mm variety, and I own one. I just never use it. I do sometimes use the uber-fat 0.9mm version for heavier line work. That bad boy gets H ("Heavy," slightly harder then HB) lead.
One other snazzy gizmo I use often is the eraser shield. It's basically a stainless-steel stencil that masks the work you want to keep while exposing tiny lines, dots, or arcs that you want to attack with your eraser.
Oddly, the majority of the real estate in my graphite drawings is produced using a blending stick, not a pencil. These tightly rolled sticks of paper push the graphite dust around the surface of your page to create those smooth gradients of gray.

After the base layer of gray is down, I can start adding shade and shadow. Again, I lay down a heapin' helpin' of graphite in the darkest areas, then feather it out into the lighter areas using the blending stick. Here, the quarter panel area behind the headlight has been blended out while I'm starting to shade the rocker panel.

The key is to start light, then build to dark. It's tempting to fill in all the heavy shadow areas early so that the image will pop. But you must resist. The danger is that you'll smear all that graphite dust over your drawing as you work on the finer details. Details first, shadows last. Also, never let your bare skin touch the artwork; always rest your hand on a clean sheet of bond paper. Your skin has oils that will smudge and yellow your artwork.
Finally, when I've gather the strength to stop obsessing over impossibly small details and can finally call the drawing finished, I spray the entire sheet with an acrylic fixativ. This locks the loose graphite dust down to the surface to prevent smearing. The good stuff won't yellow or get all crinkly. Some artists use hairspray. Some artists also use drugs. I don't use either.
Now back to the drawing board.
(*) Linguists in the audience will recognize that "black" is not the opposite of "hard." This is because language is a left-brain activity and art is right-brained. It's hard to get the two sides to agree on anything.
(**) I've also heard the "HB" stands for "Heavy Black." This doesn't make sense to me because HB is the hardest black lead you can get.
Friday, August 29, 2008
Faster Than Hell Poster

(Cropped Image)
Just your typical werewolves on motorcycles band promo.
Motorcycles by me, werewolves and poster design by Justin "Killer" Kite. To see the full poster, visit the Killer Kite website.
Monday, August 11, 2008
Gear Grinder Hot Rod Show

Illustration by The Agile Badger; poster design by Killer Kite Productions.
Thursday, July 17, 2008
Bitchin' Camaro! Bitchin' Camaro!
Disclaimer: The title of this post in no way condones the behavior depicted in the lyrics of the song "Bitchin' Camaro" by the Dead Milkmen. I do not believe that running over old ladies is a good thing. Really. So chill out already. It's a cool song though.

Friday, April 11, 2008
1967 Chevelle SS
Tuesday, March 25, 2008

Saturday, February 2, 2008
'53 Merc vs '34 Ford
This is a illustration I did for a good buddy of mine who makes, among many other things, posters for Rockabilly concerts. I did the rendering in the style of Tuck, a.k.a. Jeff Tuckner, who is without a doubt one of the best hot rod illustrators around. He's way better at this than I am. He used to be at www.hollywoodtuck.com, but that link doesn't appear to be working right now. Anyone know if he's posting work anywhere on the web?


